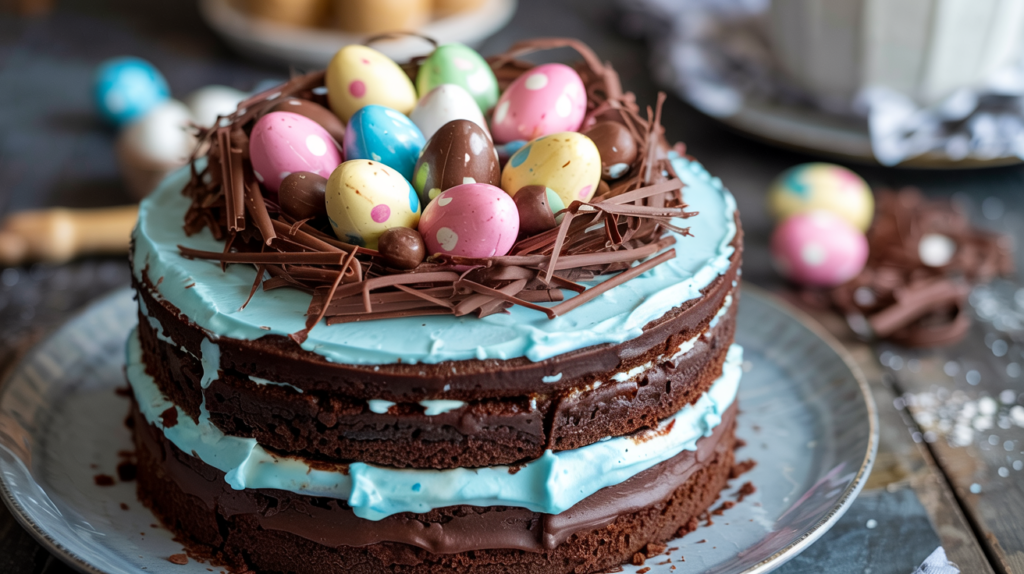
Frustrated with Bird Nest Spring Cakes that fall flat or look nothing like the picture-perfect versions you see on Instagram? You’re not alone. Creating this delicate, festive dessert can be challenging, but not anymore. This Bird Nest Spring Cake recipe delivers a stunning centerpiece that combines airy sponge cake with delicate decorative elements that truly evoke the beauty of spring.
As a pastry chef who’s specialized in seasonal desserts for over 8 years, I’ve perfected these professional techniques through countless trials in both restaurant kitchens and home baking sessions. The beauty of these tricks is their simplicity—small adjustments that yield remarkable results.
In this comprehensive guide, you’ll discover expert tips for cake texture, professional decorating shortcuts, and make-ahead strategies that ensure your Bird Nest Spring Cake becomes the highlight of any spring celebration.
Table of Contents
Why This Cake Recipe Works
- Creates a moist, tender cake that maintains its structure when decorated
- Requires basic ingredients you likely already have in your pantry
- Features professional decorating techniques that are surprisingly beginner-friendly
- Perfect for Easter, Mother’s Day, or any spring celebration
- Can be prepared in stages to fit even the busiest schedule
Choosing the Right Ingredients
Best Cake Base for Bird Nest Spring Cake
The foundation of any great Bird Nest Spring Cake is the cake itself. While vanilla sponge is traditional, you can also use lemon, almond, or even carrot cake depending on your preference. The key is selecting a cake sturdy enough to support decorative elements while remaining tender.
Buying Tips
Look for high-quality vanilla extract rather than imitation flavoring for a more authentic taste. For the freshest eggs, check the date code and choose eggs with intact, clean shells. When selecting berries for decoration, choose firm fruits with vibrant color and no signs of mold.
Substitutions
If you’re making a gluten-free Bird Nest Spring Cake, cup-for-cup gluten-free flour blends work well, but add 1/4 teaspoon xanthan gum if the blend doesn’t already contain it. For dairy-free options, coconut cream makes an excellent substitute for heavy cream in frostings.
Ingredients & Prep
Cake Prep Essentials
For the perfect Bird Nest Spring Cake base, room temperature ingredients are crucial. Set butter, eggs, and milk out at least 1 hour before baking. Line your cake pans with parchment paper and grease the sides for easy release. Properly measured flour (using the spoon and level method) prevents a dense, heavy cake.
Frostings and Fillings
For the classic Bird Nest Spring Cake:
- Swiss meringue buttercream provides stability and a silky texture
- Lemon curd offers a bright, spring-appropriate filling
- Natural food coloring (like matcha powder for green) creates vibrant nest elements
Pantry Staples
Keep these essentials on hand:
- Cake flour for lighter texture
- Pure vanilla extract
- Unsalted butter (allows control over salt content)
- Fine granulated sugar (dissolves more readily)
Step-by-Step Cake Instructions
Pre-Baking Prep
- Preheat your oven to 350°F (175°C)
- Prepare two 8-inch round cake pans with parchment paper and cooking spray
- Sift dry ingredients together to remove lumps and incorporate air
- Cream butter and sugar until light and fluffy (at least 3-5 minutes)
Baking Method
- Alternate adding dry ingredients and wet ingredients to the creamed butter mixture
- Divide batter evenly between prepared pans
- Bake for 25-30 minutes or until a toothpick inserted comes out clean
- Cool in pans for 10 minutes before transferring to wire racks
Doneness Check
The cake is done when it springs back lightly when touched and begins to pull away from the pan edges. For perfect texture, the internal temperature should reach 205-210°F.
Cooling Properly
Allow cakes to cool completely before decorating. For best results, wrap cooled layers in plastic wrap and refrigerate for 1-2 hours (or overnight) before frosting to minimize crumbs.
Pro Tips for Perfect Bird Nest Spring Cake
Professional Baker’s Trick #1: Creating the Perfect Texture
The first professional trick for an exceptional Bird Nest Spring Cake is using cake flour instead of all-purpose flour. Cake flour has a lower protein content, resulting in less gluten development and a softer, more tender crumb. If you don’t have cake flour, create a substitute by replacing 2 tablespoons of all-purpose flour with 2 tablespoons of cornstarch for each cup of flour needed.
Additionally, professional bakers always sift their dry ingredients together three times. This extra step incorporates air and ensures even distribution of leavening agents, resulting in a consistent rise and texture throughout your Bird Nest Spring Cake.
Professional Baker’s Trick #2: Simplified Nest Creation
Instead of laboring with complicated piping techniques, professionals use a simple textured approach. Create your “nest” by combining 2 cups of toasted coconut flakes with 1 tablespoon of cocoa powder for a natural-looking nest. Alternatively, use shredded phyllo dough tossed with melted butter and sugar, then baked until golden and crispy.
For the most realistic nest appearance, pipe a circular base of buttercream around the top edge of your Bird Nest Spring Cake, then press the coconut or phyllo mixture into the buttercream to form a natural-looking nest.
Professional Baker’s Trick #3: Make-Ahead Strategies
Professional bakers rarely make everything on the same day. Instead, they break the process into stages. For your Bird Nest Spring Cake:
- Bake cake layers up to 1 month ahead and freeze them wrapped tightly in plastic wrap and aluminum foil
- Prepare buttercream 3-5 days ahead and refrigerate (bring to room temperature and re-whip before using)
- Assemble the cake the day before serving, but add final decorative elements like chocolate eggs just a few hours before presentation
This staggered approach reduces stress and allows you to focus on perfect execution at each stage.
Flavor Variations
Spring-Inspired Flavors
Transform your Bird Nest Spring Cake with these seasonal variations:
- Lemon-Lavender: Add 1 tablespoon dried culinary lavender to your sugar before creaming with butter, and include lemon zest in the batter
- Strawberry-Rhubarb: Incorporate a strawberry-rhubarb compote between cake layers
- Earl Grey: Infuse the milk for your cake batter with 2 Earl Grey tea bags for a subtle floral note
Dietary Adaptations
- For gluten-free Bird Nest Spring Cake, substitute with a 1:1 gluten-free flour blend and add 1/4 teaspoon xanthan gum
- Create a vegan version using plant-based butter, flax eggs (1 tablespoon ground flaxseed + 3 tablespoons water = 1 egg), and coconut whipped cream
- Reduce sugar by 25% and add 1/4 teaspoon pure stevia powder for a less sweet option
Global Flavors
- Japanese-inspired: Add 2 teaspoons matcha powder to the batter and use white chocolate ganache frosting
- Mediterranean: Incorporate orange blossom water and pistachios into the cake and decoration
- Nordic: Add cardamom to the batter and decorate with lingonberry preserves
Serving Suggestions
Serve your Bird Nest Spring Cake on a bed of edible flowers or fresh mint leaves for a garden-fresh presentation. A dollop of vanilla bean whipped cream or a scoop of lemon sorbet makes a delightful accompaniment.
For beverages, pair with:
- Chamomile tea (hot or iced)
- Prosecco with a splash of elderflower liqueur
- Fresh lemonade with mint
FAQs
Can I make my Bird Nest Spring Cake in advance?
Yes! The cake layers can be baked and frozen for up to a month. Thaw overnight in the refrigerator before assembling. The completed cake can be refrigerated for 2-3 days, though decorative elements like chocolate eggs should be added closer to serving time.
How do I prevent my cake from drying out?
Apply a thin layer of simple syrup (equal parts sugar and water, boiled then cooled) to each cake layer before adding frosting. This professional technique locks in moisture and adds subtle sweetness.
Can I use natural food coloring for my Bird Nest Spring Cake?
Absolutely! For green elements, use matcha powder or spinach powder. For brown nests, cocoa powder works perfectly. Turmeric creates yellow, while beet powder produces pink hues.
Conclusion
With these three professional baker’s tricks—using cake flour, simplifying nest creation, and implementing make-ahead strategies—your Bird Nest Spring Cake will rival those made in professional bakeries. The beauty of these techniques lies in their simplicity; small adjustments that transform your baking results.
Don’t wait for a special occasion to try this stunning spring dessert. Your Bird Nest Spring Cake will become a cherished tradition that friends and family request year after year. Happy baking!
Ready to explore more seasonal desserts? Check out our companion recipes for Spring Flower Cupcakes or Easter Bunny Cookies next!