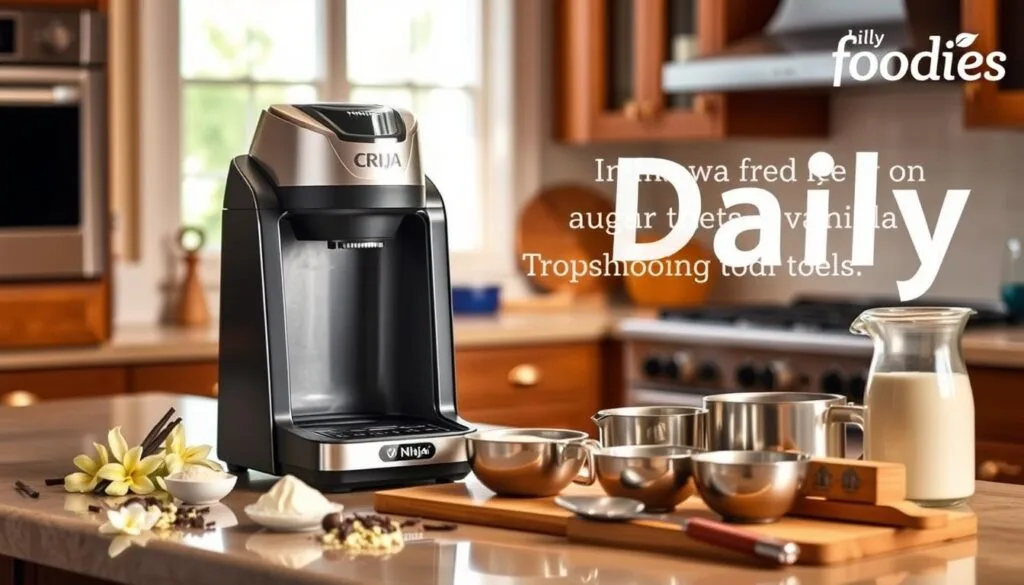
Making homemade vanilla ice cream is now easier than ever with the Ninja Creami machine. This appliance lets you make creamy, rich ice cream at home with just a few ingredients. It works by freezing the base first and then “creamifying” it, giving you smooth ice cream without eggs or long cooking times.
The recipe for Ninja Creami vanilla ice cream focuses on four main ingredients: sweetened condensed milk, thickened cream, vanilla, and vanilla bean paste or extract. You can also add your own mix-ins to make it unique or stick to the classic vanilla flavor.
Key Takeaways
- The Ninja Creami vanilla ice cream recipe uses simple, easy-to-find ingredients like sweetened condensed milk, heavy cream, and vanilla.
- The Ninja Creami method involves freezing the base first, then “creamifying” it for a rich, creamy texture without the need for eggs or cooking.
- The recipe is highly customizable, allowing you to add your own mix-ins or enjoy the pure vanilla flavor.
- Thickened cream, heavy cream, and whipping cream are all suitable options for the recipe, with variations in fat content.
- The Ninja Creami machine provides an innovative and efficient way to make homemade ice cream at home.
Essential Ingredients for Perfect Homemade Ice Cream
Understanding Different Types of Cream and Milk
To make perfect homemade ice cream with a Ninja Creami, you need to know the key ingredients. The recipe includes sweetened condensed milk, thickened cream, and whole milk. Sweetened condensed milk adds sweetness and creaminess.
The thickened cream, with 35% fat, makes the ice cream rich and velvety. Whole milk adds to the richness and mouthfeel. Together, they create a delicious ice cream.
The Role of Sweeteners and Flavorings
The Ninja Creami vanilla ice cream recipe also uses pure vanilla extract or vanilla paste. This adds the signature flavor. The sweetened condensed milk handles the sweetness, so you don’t need extra sugar.
This simplicity lets the quality of the cream, milk, and vanilla shine. It makes ice cream taste amazing.
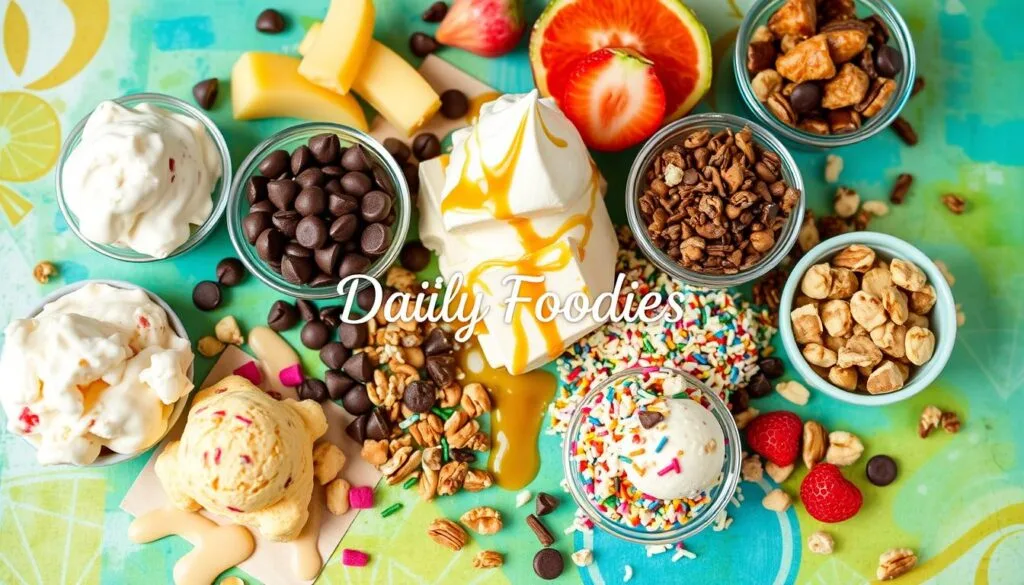
Optional Add-ins and Enhancements
- Chocolate chips or chopped chocolate
- Fruit pieces (such as berries or diced peaches)
- Nuts (like chopped almonds or pecans)
- Swirls of caramel or chocolate sauce
The basic Ninja Creami vanilla ice cream is already delicious. But, you can add mix-ins and toppings to make it even better. These optional additions can make the ice cream more indulgent and creative.
| Ingredient | Purpose | Quantity |
|---|---|---|
| Sweetened Condensed Milk | Provides sweetness and creaminess | 1 can (14 oz) |
| Thickened Cream (35% fat) | Contributes to rich, velvety texture | 1 cup |
| Whole Milk | Adds to the overall richness and mouthfeel | 1 cup |
| Vanilla Extract or Paste | Infuses the ice cream with its signature flavor | 1 teaspoon |
Getting Started with Your Ninja Creami Machine
Ninja Creami is a special ice cream maker. It makes homemade frozen treats easy and fun. Unlike old ice cream makers, it freezes and blends for a creamy texture.
To start making treats, you need to set up the machine right. First, make sure the Ninja Creami pint fits well. This is key for the machine to work right.
- Carefully insert the pint into the base, aligning the tabs on the pint with the slots in the base.
- Gently push the pint down and twist it clockwise until it clicks into place, indicating a proper seal.
- Make sure the lid is firmly closed and locked before starting the machine.
The Ninja Creami has seven settings for different treats. Learn about each setting, like “Ice Cream,” “Gelato,” and “Sorbet.” This helps pick the right one for your recipe.
| Setting | Description |
|---|---|
| Ice Cream | Churns the mixture to a creamy, smooth texture. |
| Gelato | Produces a dense, rich, and silky-smooth frozen dessert. |
| Sorbet | Creates a refreshing, fruit-based frozen treat. |
| Milkshake | Blends the mixture into a thick, creamy milkshake consistency. |
By following these easy steps and learning about the settings, you’re ready to make tasty ice cream and treats at home.
Basic Ninja Creami Vanilla Recipe
Making homemade vanilla ice cream with your Ninja Creami is simple. Follow a basic recipe and freeze it right. You’ll have creamy, top-notch ice cream in your kitchen.
Base Mixture Preparation
To start, gather your ingredients: 1 cup of whole milk, 3/4 cup of heavy cream, 1 tablespoon of cream cheese, 1 teaspoon of vanilla bean paste, and 1/3 cup of sugar. Begin by softening the cream cheese in the microwave for about 10 seconds. Next, combine the softened cream cheese with the sugar, milk, and heavy cream, stirring until the sugar is fully dissolved.
Proper Freezing Techniques
Pour the vanilla ice cream mixture into a Ninja Creami pint container. Place it on a flat surface inside your freezer. Allow it to freeze thoroughly for 24 hours.
Processing Instructions
- Take the frozen pint out of the freezer and put it in your Ninja Creami.
- Choose the “Ice Cream” function. Let it process until it’s smooth, about 1-2 minutes.
- If it’s crumbly or icy, use “Re Spin” and add a tablespoon of milk to smooth it out.
By preparing the base, freezing it, and processing it in your Ninja Creami, you’ll have tasty vanilla ice cream.
Tips for Achieving the Perfect Texture
To get the perfect creamy ice cream with your Ninja Creami, start with the right prep. Make sure your ingredients are mixed well and the sugar is dissolved before freezing. Freezing the base for at least 24 hours is key for the best results.
If your ice cream is too soft, freeze it a bit longer. The “Re-Spin” function on the Ninja Creami can also make it smoother. Adding a small amount of xanthan gum can make it even thicker and creamier.
The type of dairy you use affects the ice cream’s texture. Using whole milk and heavy cream makes it richer and creamier. For a lighter version, try almond or oat milk, but they might change the texture slightly.
| Ingredient | Quantity | Nutrition Facts (per serving) |
|---|---|---|
| Heavy Cream | 2 cups | Calories: 1600, Total Fat: 176g, Saturated Fat: 110g, Cholesterol: 680mg, Sodium: 160mg, Total Carbs: 12g, Sugars: 12g, Protein: 10g |
| Whole Milk | 1 cup | Calories: 150, Total Fat: 8g, Saturated Fat: 5g, Cholesterol: 25mg, Sodium: 100mg, Total Carbs: 12g, Sugars: 12g, Protein: 8g |
| Granulated Sugar | 3/4 cup | Calories: 480, Total Fat: 0g, Saturated Fat: 0g, Cholesterol: 0mg, Sodium: 0mg, Total Carbs: 120g, Sugars: 120g, Protein: 0g |
| Vanilla Extract | 2 teaspoons | Calories: 24, Total Fat: 0g, Saturated Fat: 0g, Cholesterol: 0mg, Sodium: 0mg, Total Carbs: 1.6g, Sugars: 1.6g, Protein: 0g |
By following these tips and understanding the role of different ingredients, you’ll be well on your way to achieving the perfect ice cream texture and creamy consistency with your Ninja Creami.
Ninja Creami Vanilla Variations and Modifications
The Ninja Creami machine lets you make more than just vanilla ice cream. You can try low-fat and dairy-free options. These variations are great for those watching their diet or with dietary restrictions. They taste amazing without the guilt.
Low-Fat Options
For a lighter version, use light condensed milk and 2% or 1% milk. The ice cream might be softer, but it’s just as tasty. You can adjust the sweetness to your taste, as the lighter ingredients can make it sweeter.
Dairy-Free Alternatives
Want a dairy-free version? Try unsweetened oat milk and unsweetened coconut cream. Adding vegan cream cheese makes it creamy. Remember to adjust the sweetness, as these changes can affect it.
| Ingredient | Low-Fat Option | Dairy-Free Alternative |
|---|---|---|
| Cream | Light thickened cream | Unsweetened coconut cream |
| Milk | 2% or 1% milk | Unsweetened oat milk |
| Sweetener | Granulated sugar | Granulated sugar |
| Cream Cheese | Whipped cream cheese | Vegan cream cheese |
With these simple swaps, you can enjoy tasty low-fat or dairy-free vanilla ice cream. It’s a great way to indulge in your favorite treat while meeting your dietary needs.
“The Ninja Creami machine has opened up a whole new world of homemade ice cream possibilities, allowing us to create both low-fat and dairy-free versions that are just as creamy and satisfying as the original.”
Troubleshooting Common Issues
Making homemade ice cream with your Ninja Creami can be fun, but you might face some problems. Don’t worry, we’ve got some tips to help you make the perfect ice cream every time.
One common issue is ice cream that’s too soft or melty. If this happens, just put the pint back in the freezer for a bit. Or, process it closer to when you want to eat it. If your ice cream is crumbly, try using the Re-Spin function or add a tablespoon of milk and spin it again.
Another problem is when chocolate mix-ins lose their flavor in the freezer. To avoid this, add your chocolate chips or cookie chunks after the ice cream is processed. Don’t mix them in during the first churn.
Lastly, make sure your freezer is cold enough. If it’s too warm, your ice cream won’t freeze right. This can make it soft and icy. Adjusting your freezer settings can help a lot.
By remembering these tips, you’ll make delicious, creamy ice cream every time. A little bit of experimentation and paying attention to details can really help you make amazing frozen treats.
Storage and Serving Recommendations
Keeping your homemade Ninja Creami ice cream fresh is key. The right storage and serving methods are essential for its creamy texture and flavor.
Best Containers for Storage
The Ninja Creami pints are the best for storing your ice cream. They are sturdy and airtight, keeping your ice cream fresh. Always seal the lids tightly when storing.
Optimal Serving Temperature
Let your ice cream sit at room temperature for a few minutes before serving. This makes it easier to scoop and keeps it creamy. The best serving temperature is around 10-12°F (-12 to -11°C).
If your ice cream has been stored for a while, reprocess it in the Ninja Creami vanilla machine. This will make it creamy again and prevent it from becoming icy or hard.
By following these tips, your homemade Ninja Creami vanilla ice cream will stay a delicious treat for everyone to enjoy.
Creative Mix-In Ideas and Toppings
Turn your homemade Ninja Creami vanilla ice cream into a special treat with mix-ins and toppings. Add fun and flavor with these ideas:
- Chocolate Chips: Mix in mini chocolate chips or chunks for a chocolate-vanilla mix.
- Fruit Pieces: Add diced fresh or frozen berries, sliced bananas, or chopped mango for a fruity twist.
- Nuts: Sprinkle toasted almonds, pecans, or walnuts for a crunchy texture and nutty flavor.
- Cookie Crumbs: Crush your favorite cookies, like Oreos or graham crackers, and mix them in for a fun texture.
For a McFlurry-like treat, mix in candies like M&M’s or crushed Oreo cookies. To make your vanilla Ninja Creami vanilla ice cream even better, try drizzling on fudge sauce, caramel, or chocolate syrup.
You can add mix-ins during the processing or sprinkle them on top after scooping. This lets you control the texture and flavor. The fun of making ice cream at home is in trying new mix-ins and toppings!
“The best part about making ice cream at home is the ability to get creative with mix-ins and toppings. It’s a fun way to explore new flavor combinations and make each batch unique.”
Conclusion
Making homemade ice cream with the Ninja Creami vanilla has many benefits. You can choose the ingredients to make healthier treats that fit your diet and taste. The Ninja Creami vanilla makes ice cream smooth and creamy, without the need for churning.
With the Ninja Creami, you can try different flavors and mix-ins. You can even use dairy-free options. This lets you make a wide range of frozen desserts, from vanilla ice cream to sorbets and gelatos.
If you want to satisfy a sweet tooth or enjoy homemade ice cream, the Ninja Creami vanilla is perfect. By using the tips from this guide, you can make amazing frozen treats at home. It’s easy and fun to do.
FAQ
What are the key ingredients for making Ninja Creami vanilla ice cream?
To make Ninja Creami vanilla ice cream, you need sweetened condensed milk, thickened cream, whole milk, and vanilla extract or paste. Sweetened condensed milk adds sweetness and creaminess. Thickened cream and whole milk make it rich and creamy.
How does the Ninja Creami machine work differently from traditional ice cream makers?
The Ninja Creami vanilla freezes the ice cream base first. Then, it uses special blades to finely chop or shave it. This creates a creamy texture, unlike traditional ice cream making.
How do I properly assemble and use the Ninja Creami machine?
Make sure the Ninja Creami vanilla pint is assembled and locked right. Follow the machine’s instructions for the best results.
What is the process for making the Ninja Creami vanilla ice cream base?
Mix cream cheese, sugar, and vanilla extract first. Then, add milk and heavy cream slowly, stirring until the sugar dissolves. Pour it into a Ninja Creami vanilla pint and freeze for 24 hours before processing.
How can I achieve the perfect texture for my Ninja Creami vanilla ice cream?
Mix the ingredients well and make sure the sugar dissolves before freezing. Freeze the base for at least 24 hours. If it’s too soft, freeze it longer. Use the Re-Spin function for a smoother texture. Adding a small amount of xanthan gum can also help.
What are some low-fat and dairy-free alternatives for Ninja Creami vanilla ice cream?
For low-fat options, use light condensed milk, light thickened cream, and light milk. For dairy-free, use unsweetened oat milk, unsweetened coconut cream, and vegan cream cheese. Adjust the sweetness when making substitutions.
How do I troubleshoot common issues with my Ninja Creami vanilla ice cream?
If the ice cream is too soft, freeze it longer or process it closer to serving. For a crumbly texture, use the Re-Spin function or add a tablespoon of milk and Re-Spin. If chocolate mix-ins lose flavor, add them after processing. Make sure the freezer is cold enough.
How should I store and serve my homemade Ninja Creami vanilla ice cream?
Store the ice cream in Ninja Creami vanilla pints with lids on. Let it soften slightly at room temperature before serving. If stored for a long time, re-process it before serving. The best serving temperature is around 10-12°F (-12 to -11°C).
What are some creative mix-in ideas and toppings for Ninja Creami vanilla ice cream?
Add mix-ins like chocolate chips, fruit pieces, nuts, or cookie crumbs to the vanilla ice cream. For a McFlurry-style treat, add M&M’s or Oreos. You can also add fudge sauce or caramel as toppings. Mix-ins can be added during processing or sprinkled on top after scooping.